AN
EXTENSION DINING TABLE

Extension
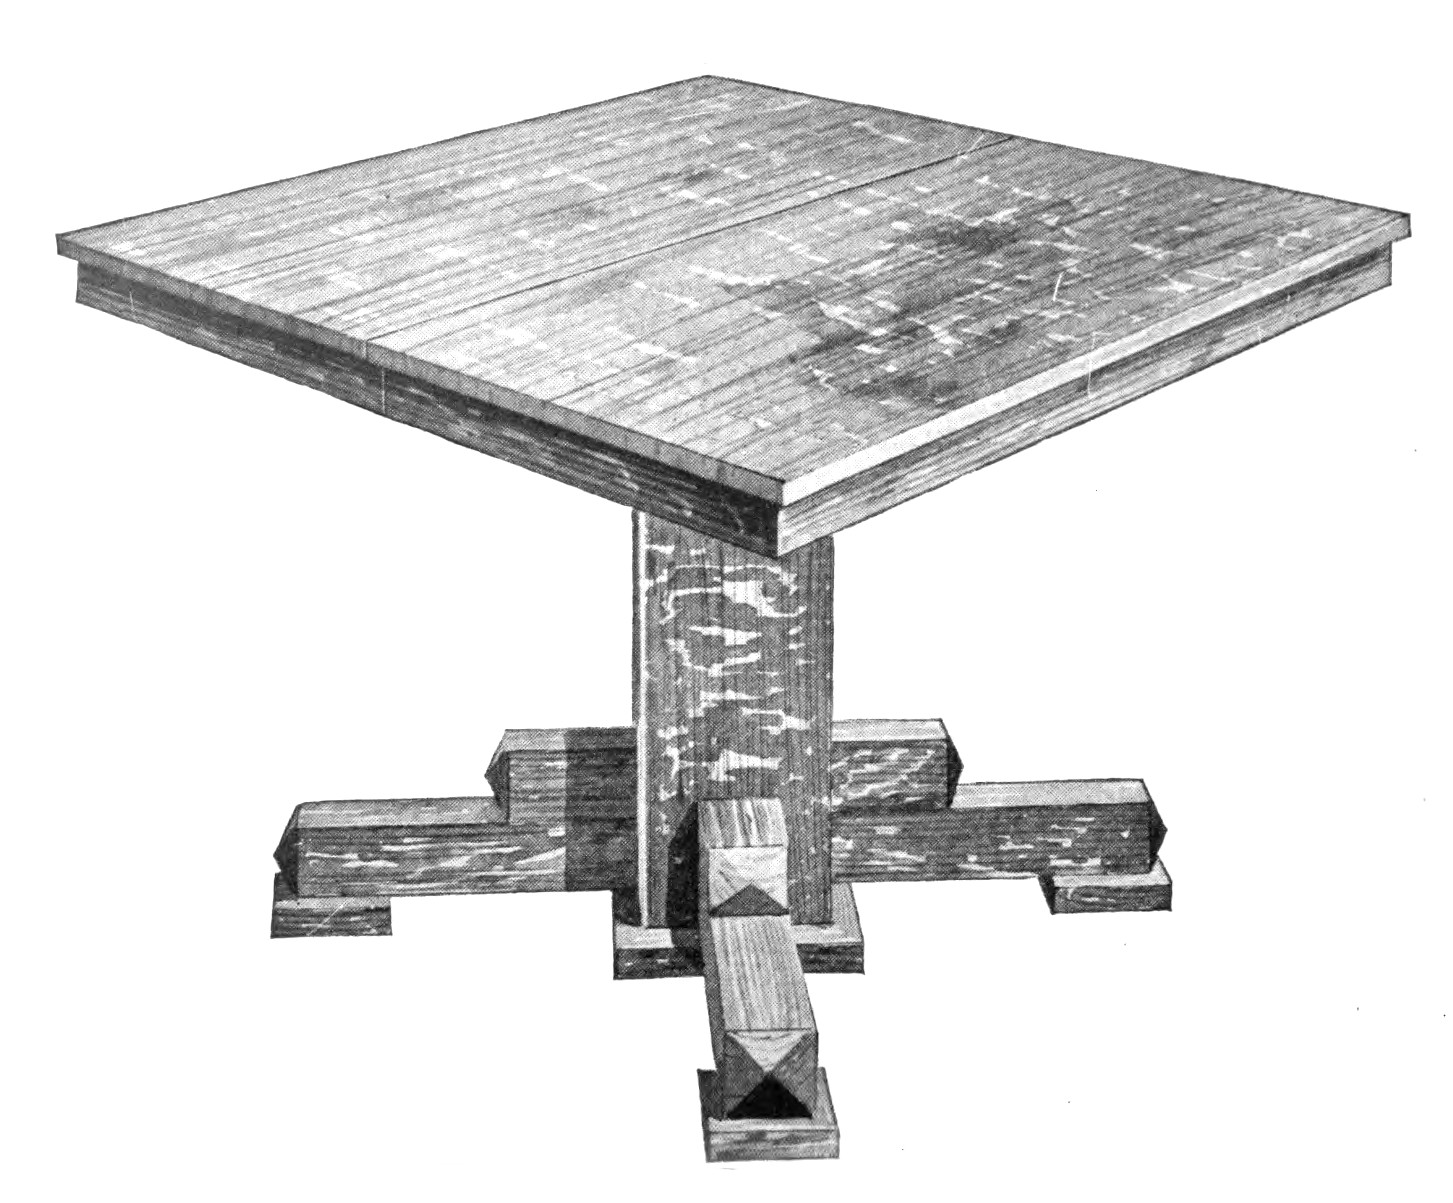
Dining Table Complete
The accompanying
sketch
and photograph show a simple design of an extension dining table of
the mission style. It is very easy to construct and can be built at
home by anyone who is at all handy with tools. It should be made of
quarter-sawed oak, which can be secured at the mill ready cut to
length, squared and sanded. Order the following pieces:
2 top pieces, 1 by 23
by 46 in.
2 extra leaves, 1
by 12
by 46 in.
2 rails, 3/4 by 3
by 44
in.
4 rails, 3/4 by 3
by 22
in.
2 pieces for posts,
3/4
by 8 by 24 in.
2 pieces for posts,
3/4
by 6 by 24 in.
4 pieces for feet,
3 by
3 by 14 in.
4 pieces for feet,
3 by
3 by 5 in.
4 pieces for feet,
1 by
4 by 4 in.
4 pieces moulding,
1 by
1 by 10 in.
1 piece, 1 by 12 by
27
in., birchwood.
2 brackets, 3/4 by
3 by
32 in., birchwood.
2 pieces for slide,
1
3/4 by 3 by 36 in., birchwood.
4 pieces for slide,
1
by 3 by 36 in., birchwood.
12 pieces for
slide, 3/4
by 1 1/2 by 36 in., birchwood.
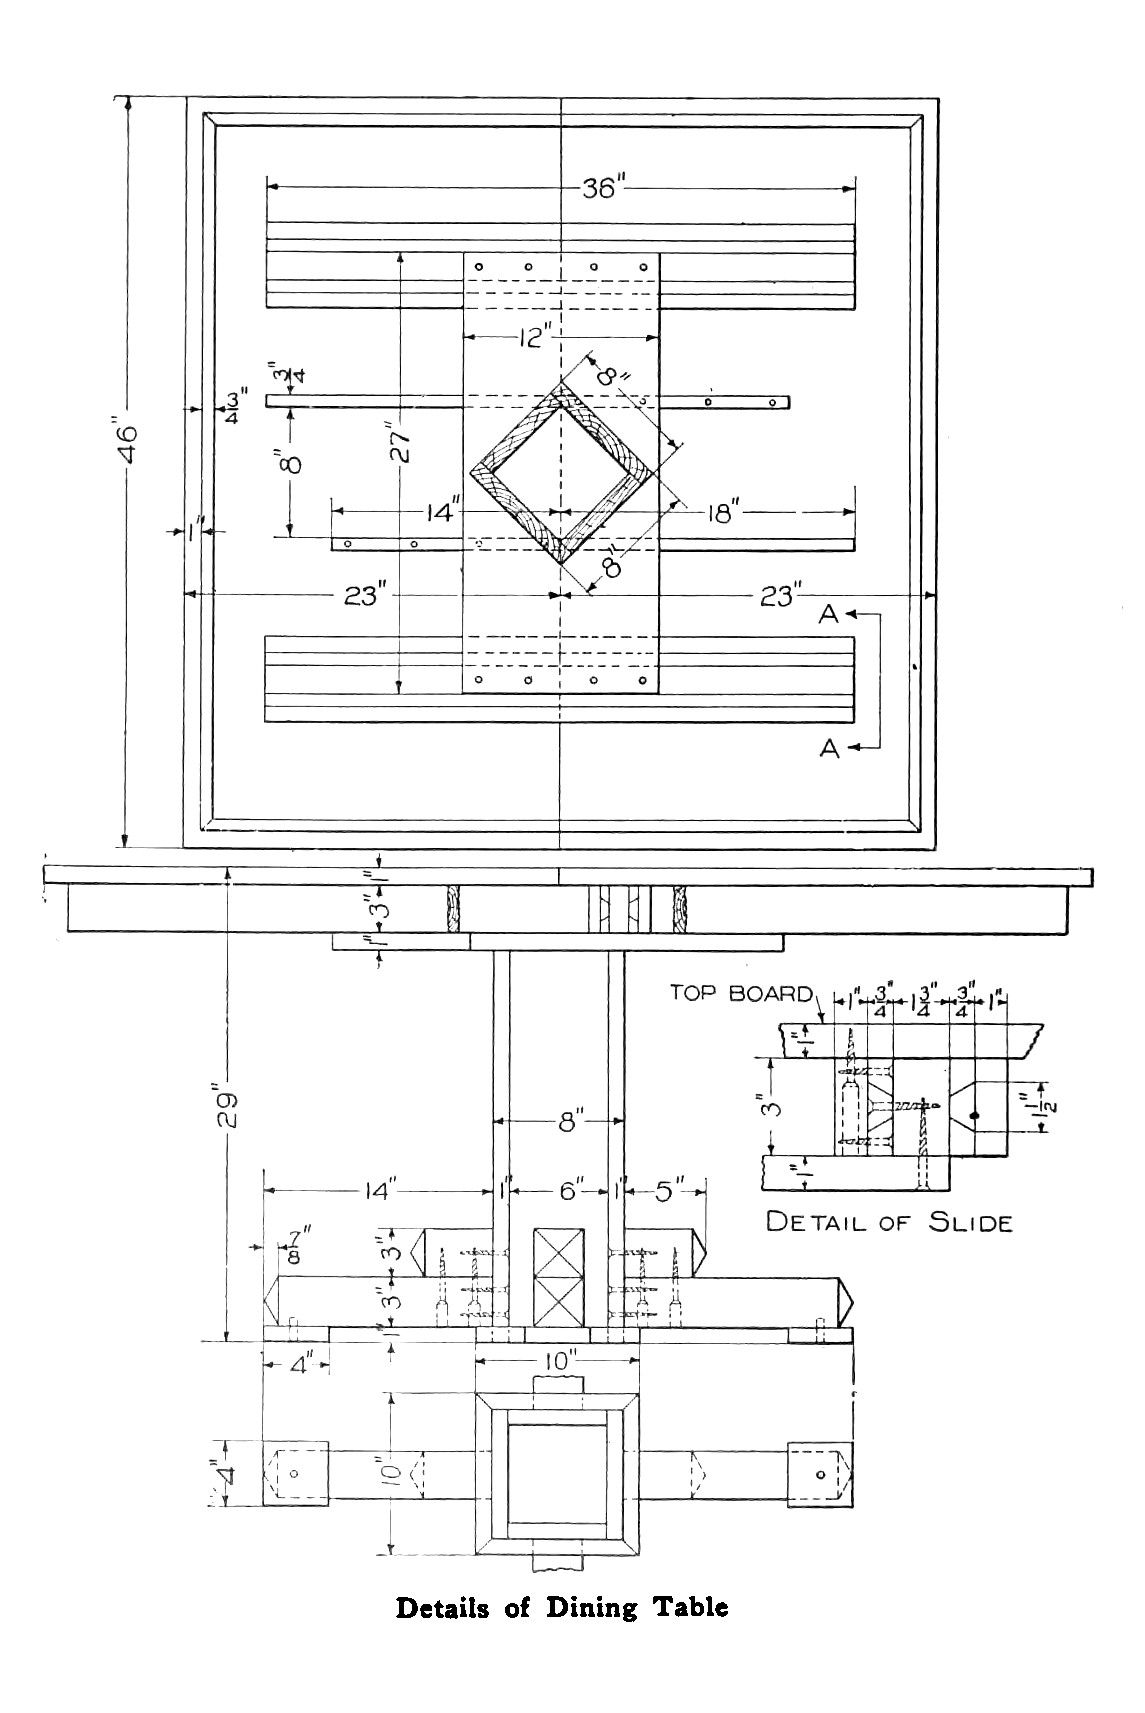
The feet can be
made
first by squaring up one end of each and beveling the other as shown
in the drawing. The short pieces are fastened to the long ones by
means of long screws and glue. The four square pieces should be
nailed to the outer ends and holes bored in them for the casters.
Prepare the pieces for the posts, and before nailing them together
fasten the feet to them with long screws. Be careful to get them on
square, else the table will not set level when complete. Now nail and
glue the pieces forming the table together and fasten the moulding at
the bottom. This moulding should have mitered corners as shown in the
bottom view. Also fasten the rest piece to the top of the post, using
long screws and glue.
The slides can
be made
next. The pieces are made and fastened together with screws as shown
in the enlarged detail view. This slide, if made with care, is a good
one. The center piece should be firmly fastened to the post rest with
long screws. The screws that fasten into the top should be inserted
from below through counter-bored holes as shown.
Miter the:rails
at the
corners and glue them to the top. Blocks can be used on the inside if
desired, which will make a much stronger construction. Screw the two
brackets to the top as shown. These help to support the table when it
is extended.
When complete
the table
should be carefully gone over with fine sandpaper, and all glue and
rough spots removed. Apply stain of the desired color. This can be
any one of the many mission stains supplied by the trade for this
purpose.

Details of Dining Table.
(click for larger image) |

