| A
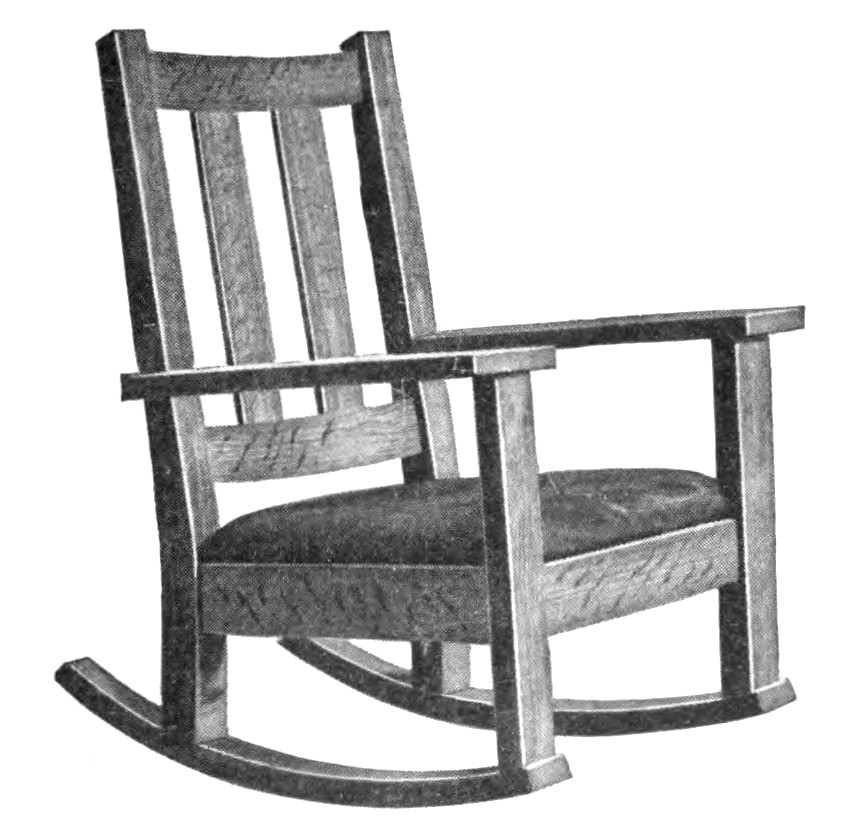
ROCKING CHAIR

In furniture
construction
such as this, nothing is gained by trying to plane up the stock out
of the rough. This is mere drudgery and can be more cheaply and
easily done at the planing mill by machinery. There will be plenty to
do to cut and fit all the different parts. Order the pieces
mill-planed and sandpapered to the sizes specified below.
Plain sawed red
oak takes
a mission finish nicely and is appropriate. Some people like
quartered white oak better, however. The cost is about the same.
The stock for
the chair
is as follows: Widths and thicknesses are specified exact except for
the rear costs and the rockers; but to the lengths enough surplus
stock has been added to allow for squaring the ends.
2 front posts, 1 5/8 by 2
1/4 by 22 1/2 in., S-4-S.
2 back posts, 1 5/8
by 11
by 40 in., S-2-S.
1 front horizontal,
3/4
by 3 1/2 by 22 in., S-4-S.
1 back horizontal,
3/4 by
3 1/2 by 20 in., S-4-S.
2 back horizontals,
3/4
by 3 1/2 by 20 in., S-4-S.
2 side horizontals,
3/4
by 3 1/2 by 20 in., S-4-S.
2 back slats, 5/16
by 3
1/2 by 20 in., S-4-S.
2 arms, 1 by 4 1/2
by 25
in., S-2-S.
1 rocker, 2 1/2 by
6 by
33 in., S-2-S.
5 bottom slats, 3/4
by 2
1/2 by 19 1/2 in., S-4-S.

Rocking
Chair Complete
Begin work on
the posts
first. The front posts should have one end of each squared, after
which they can be cut to the exact length. The rear posts, according
to the stock bill, are specified for the exact thickness. By
exercising forethought, both may be got from the piece ordered. The
tops and bottoms of the posts should have their edges slightly
chamfered to prevent their slivering.
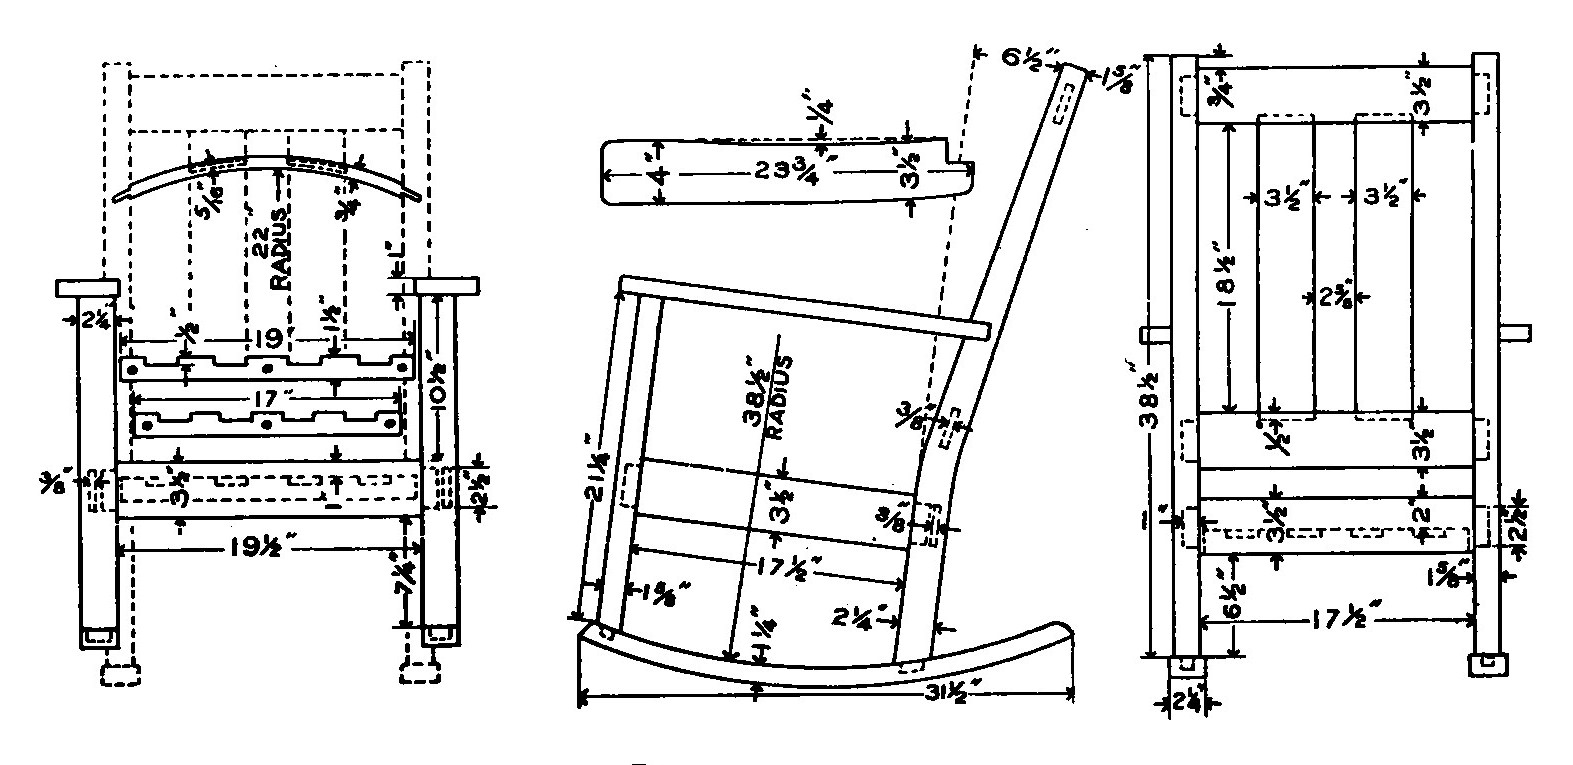
The shape of the
arm is a
little out of the ordinary, but the drawing indicates quite clearly
how it is cut. The arm is fastened to the posts by means of dowels
and glue after the other parts of the chair have been put together.
Now prepare the
curved
parts of the back. These parts are worked to size, after which they
are thoroughly steamed and bent in the forms described on another
page. These forms should have a surface curve whose radius is 22 in.
While the parts are drying out, go ahead with the cutting of the
mortises and tenons of post and rail.

(Click for larger image)
Inasmuch as the
width of
the front of the chair exceeds that of the back by 2 in., allowance
must be made for slant either in the tenons of the side rails or in
the mortises. This will necessitate the use of the bevel in laying
off the shoulders of the tenons.
The slats for
the bottom
are made long enough so that their ends may be "let into"
the front and back rails, a 3/4 in. groove being plowed to receive
them.
Assemble the
back, then
the front; and when the glue on them has dried, put the side rails in
place, then the arms. The chair should now be scraped and sandpapered
preparatory to applying the finish.
The cushion
shown in the
picture is made of Spanish roan skin leather and is filled with
elastic felt. Such cushions can be purchased at the upholsterer's or
they can be made by the craftsman himself. Frequently the two parts
of the cushion are laced together by means of leather thongs.
|

