 |
BLACKBOARD
SKETCHING
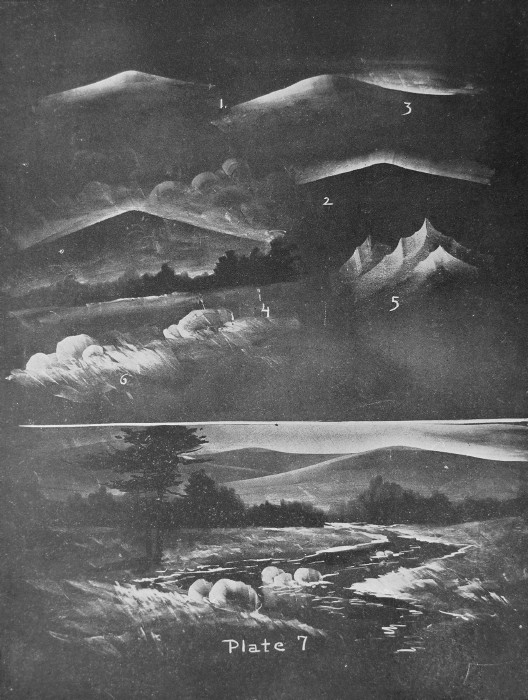
PLATE 7
In
this lesson we will put to practical use such strokes as those given in
the
first few lessons. The sketches of this character are often valuable in
the
schoolroom when studying the mountains, the hillside, the river, etc.,
and the
teacher who, with a few strokes of the chalk, can interpret to her
class the
thing about which they are studying, and can make an illustration
which the
whole class can see and appreciate, has an invaluable gift.
Experiment
with the
strokes given at 1, 2 and 3. As in previous lessons the side of the
chalk is
used, and the accent is with one end. Try to give the effect of snow,
of rocks,
of a bright day, or of a cloudy day, by varying the tone or pressure
upon the
chalk. Sometimes use the chalk for sky, leaving the board for the
hills. Then
reverse the stroke, letting the sky remain gray and using the chalk to
represent the mountain, accenting with the upper end of the chalk. No.
3 is a
combination of 1 and 2, the chalk being used in both sky and mountain.
In No
4, the eraser or a soft bit of cloth is used to take out the trees
after the
chalk has been applied.
In the
sketch given on the lower part of the
plate combine the suggestions given above. A few short, curving strokes
with
the usual accent at one end of the crayon will give the rocks, and the
irregular horizontal and zigzag strokes already given will produce the
ripples
in the river, and the foreground.
|